How to Install Network Printer Step by Step.
In this post, I'll talk just about network or Ethernet printers. Likewise, this short article is for Windows XP users. If you're utilizing Windows 7 or Windows 8, the procedure is far simpler, and you can read my other post on including a printer to Windows 8 here. Now let's begin. Here's exactly what you'll have to perform to setup the printer on your Windows XP device:Action 1: First, link the printer to your network by linking one end of a Feline 5 or 6 cable television (which ought to have included your printer) to your router and the other end into the network port of your printer. Now, turn your printer on and wait on it to finish being prepared.

Action 2: Next you'll have to get the IP address of your printer. The IP address is exactly what will let your computer system understand where to discover your printer on the network. All network printers permit you to print a setup sheet that will note first details about the printer together with the existing network structure.
For a lot of printers, this includes pushing the Menu button on the printer, going to the Details choice and picking Print Setup. Often if there is no screen, you just press and hold the Go or Print button down for about 10 seconds, and it'll print the setup page. You will be trying to find the TCP/IP area:.

The IP Address is exactly what you'll require for the next actions. Your printer must immediately get an IP address from the DHCP server on your network. In your home, the IP needs to be originating from the cordless router or property entrance if you have one that serves as a cable television modem plus router.
Action 3: The last step is to include the printer to your computer system. Click Start, then Printers and Faxes.

How to Install Network Printer Step by Step, If you do not see this in your Start Menu, you can go to Start, Control board then click Printers and Faxes there. Click Include Printer from the job pane left wing.

The Include Printer wizard will start, so click Beside get going. On the next screen, you'll be asked whether your printer is a local printer or a network printer. These alternatives are puzzling since a network printer is, in fact, referring either a printer linked to another computer system or a printer on a print server.
Our printer is a stand-alone printer. Therefore, you should choose Regional printer connected to this computer system and make certain that you uncheck package for immediately finding the printer.
Going Here:

Click Next, and you'll be asked to pick the printer port. Given that our printer is a network printer with an IP address, we have to choose the Develop a brand-new port alternative and select Basic TCP/IP Port.

Click Next, and you'll be asked to choose the printer port. Because our printer is a network printer with an IP address, we have to pick the Produce a brand-new port alternative and select Basic TCP/IP Port.

Click Next and depending upon the printer you have, you might get another dialog before completion of the wizard. If the network card for the printer can not be recognized, the wizard will ask you to pick the card type. You can leave the default of "Generic Network Card" and click Next.

Click Next and click Complete. You will then continue with the Include Printer wizard, and you'll have to either pick the printer from the list of makers or click Have Disk and place your printer chauffeur cd in the computer system. How to Install Network Printer Step by Step.

Click Next and get in a name for your printer and click the Yes radio button if you would like the printer to be your default printer.

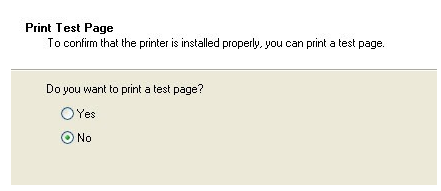
Click Next, and you'll be asked whether you wish to share the printer or not. Click No because anybody else who wants to link will have the ability to do so following the same actions. In later on variations of Windows XP, the printer sharing dialog has been gotten rid of. Click Next and click Yes to print a test page and ensure that the computer system and printer can interact!
How to Install Network Printer Step by Step, Click Next then Click End up! The brand-new printer will appear in your Printers and Faxes screen, and you're prepared to print to your network printer in Windows XP!